2D Animation (3 credits)
Week 07
COURSE CALENDAR | WEEK 07 CLASS OUTLINE
Topics Covered in Class:
MIDTERM EXAM: (30 Min)
COLLECT ASSIGNMENTS: Hand in CD with assignments saved as .swf's labeled properly or upload to server for my review:
-Ball animation even paced
-Ball animation ease in
-Ball animation ease out
-Ball bounce
-Ball Bounce HW
-Pendulum swing
-Rotoscope
-Rat tail cycle
-Flour sack
Extra credit: Flag cycle
CLASS ASSIGNMENT:
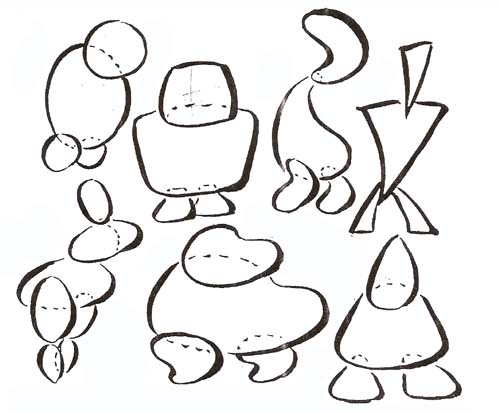
Lecture on character building.
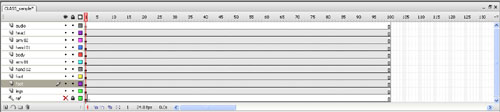
CHAR BUILDING: Main stage should have 3 layers in timeline: Field guide, Audio, and Char layer..
1. Go into the Char_All symbol and build first position as usual placing each part on a separate layer in order to animate easier later.
Name parts of char from char P.O.V. It will remain constant even when the char is flipped.
Once inside the char_all layer, there is no need to include the char name in the layer name column.
Try to keep the description under 10 char. Otherwise it can’t bee seen in the window and becomes useless.
2. Go into the head symbol of char (char_head_all)
-char_all
• Create the rest of the head rotation inside of this symbol in order to make it”hot swappable.” You will break them out into separate symbols later.
3. Go back one level to the char_all and make 4 blank key frames in all the layers.
-Now create the other body rotations in these blank key frames in order to make them hotswappble later on. Start with the head. Copy it to the other blank key frames and key it to the proper frame number. In this case 1-5.
-Be careful to paste in place and do not move its position, rotation, or center point.
-Do the Body the same way as the head in order to make it hotswappable. (See step 2)
-Only the char_head, and the char_all need to be hotswappable ;( sometimes the torso as well.) For line thickness issues, and ease of use I will create the rest of the body parts from the original positions. Use the Duplicate symbol command in order to create them and name them appropriately.
4. You should have a complete turn around now inside the char_all symbol. Make sure all parts are labeled correctly, instances are correct, center point, in their logical positions, etc… The head is still char_head_all in all positions at this point.
5. Go out to the main timeline. Duplicate char_all 5 times and position them over the model sheet. Right click and duplicate symbol renaming to char_all_01, char_all_02…
6. Then go inside each renamed symbol and delete the frames which don’t correspond to that position on the model sheet. All symbols should start on frame 1.
7. Now repeat the same steps with the head symbol. Renaming it to char_head_01, char_head_02…
8. Congratulations, you have now created a character which every animator will love to work with.
Things to watch out for:
•Naming conventions.
•Items which are hotswappable need to be named something which will fall next to each other in the Flash Library for ease of use while animating.
•Name parts of char from char P.O.V.
•Try to keep the description under 10 char on the layer name.
•Rotation points in most logical positions.
•Make sure every part is a symbol and they are on single frame in the properties box.
•Movie is 720x486, 24 fps.
Homework:
Have your char built and rigged ready to start animation with next week.
We will be using Flash for the rest of the semester, but please remember that we will continue to use traditional animation techniques (frame-by-frame animation). Review the following Flash Video Tutorials:
5. Understanding Motion Tween (useful for basic animation, but not complicated actions)
justin simonich